Create a view
- Open Support and choose All or For you in the sidebar. Your saved view will apply its filters on top of that view.
- Click Filter and add a condition, such as Status is Submitted. Search text and sort order are saved too.
- Click New view beside the filters.

- Type a unique name in the new sidebar row and press Enter. Press Escape to cancel.
Reopen or update a view
Click its name under Support in the sidebar. Change the filters, search text, or sort order, then click Save beside the filters. To keep the original and save your changes as a separate view, click New view instead.
Rename or delete a view
Hover over a saved view in the sidebar and open its … menu.
- Rename view: edit the name in place and press Enter. Press Escape to cancel.
- Delete view: click it, then click Confirm delete in the same menu. This removes the saved view, not its tickets.
Choose your default
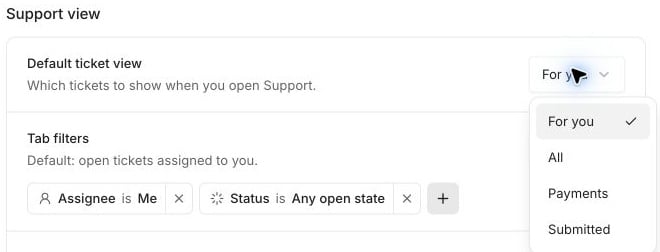
Open Preferences and, under Support view → Default ticket view, choose your saved view. The choice saves automatically and opens the next time you enter Support.